
A friend of mine recently seek my advice on makeup and one of the topics was eye shadows.
Before I hopped on the beauty pageant life, I was a girlish- tomboy (actually... I still am) and all I had for makeup was black eyeliner and mascara. I didnt know how to use eye shadows or what to get.

So that conversation has now prompt me to share a little on my personal eye shadow collection and I hope this can help all makeup newbies out there.
The Basic
If you are new, I would recommend getting a basic eye shadow set!
What exactly is The Basic?
Well, eye shadows comes in all colours and shades with a matte, glossy, shimmer or glitter finish.
The Basics to me would be eye shadows in the shade spectrum of browns, and I recommend getting them in matte finish with only the highlighting colour in shimmer or glitter finish.
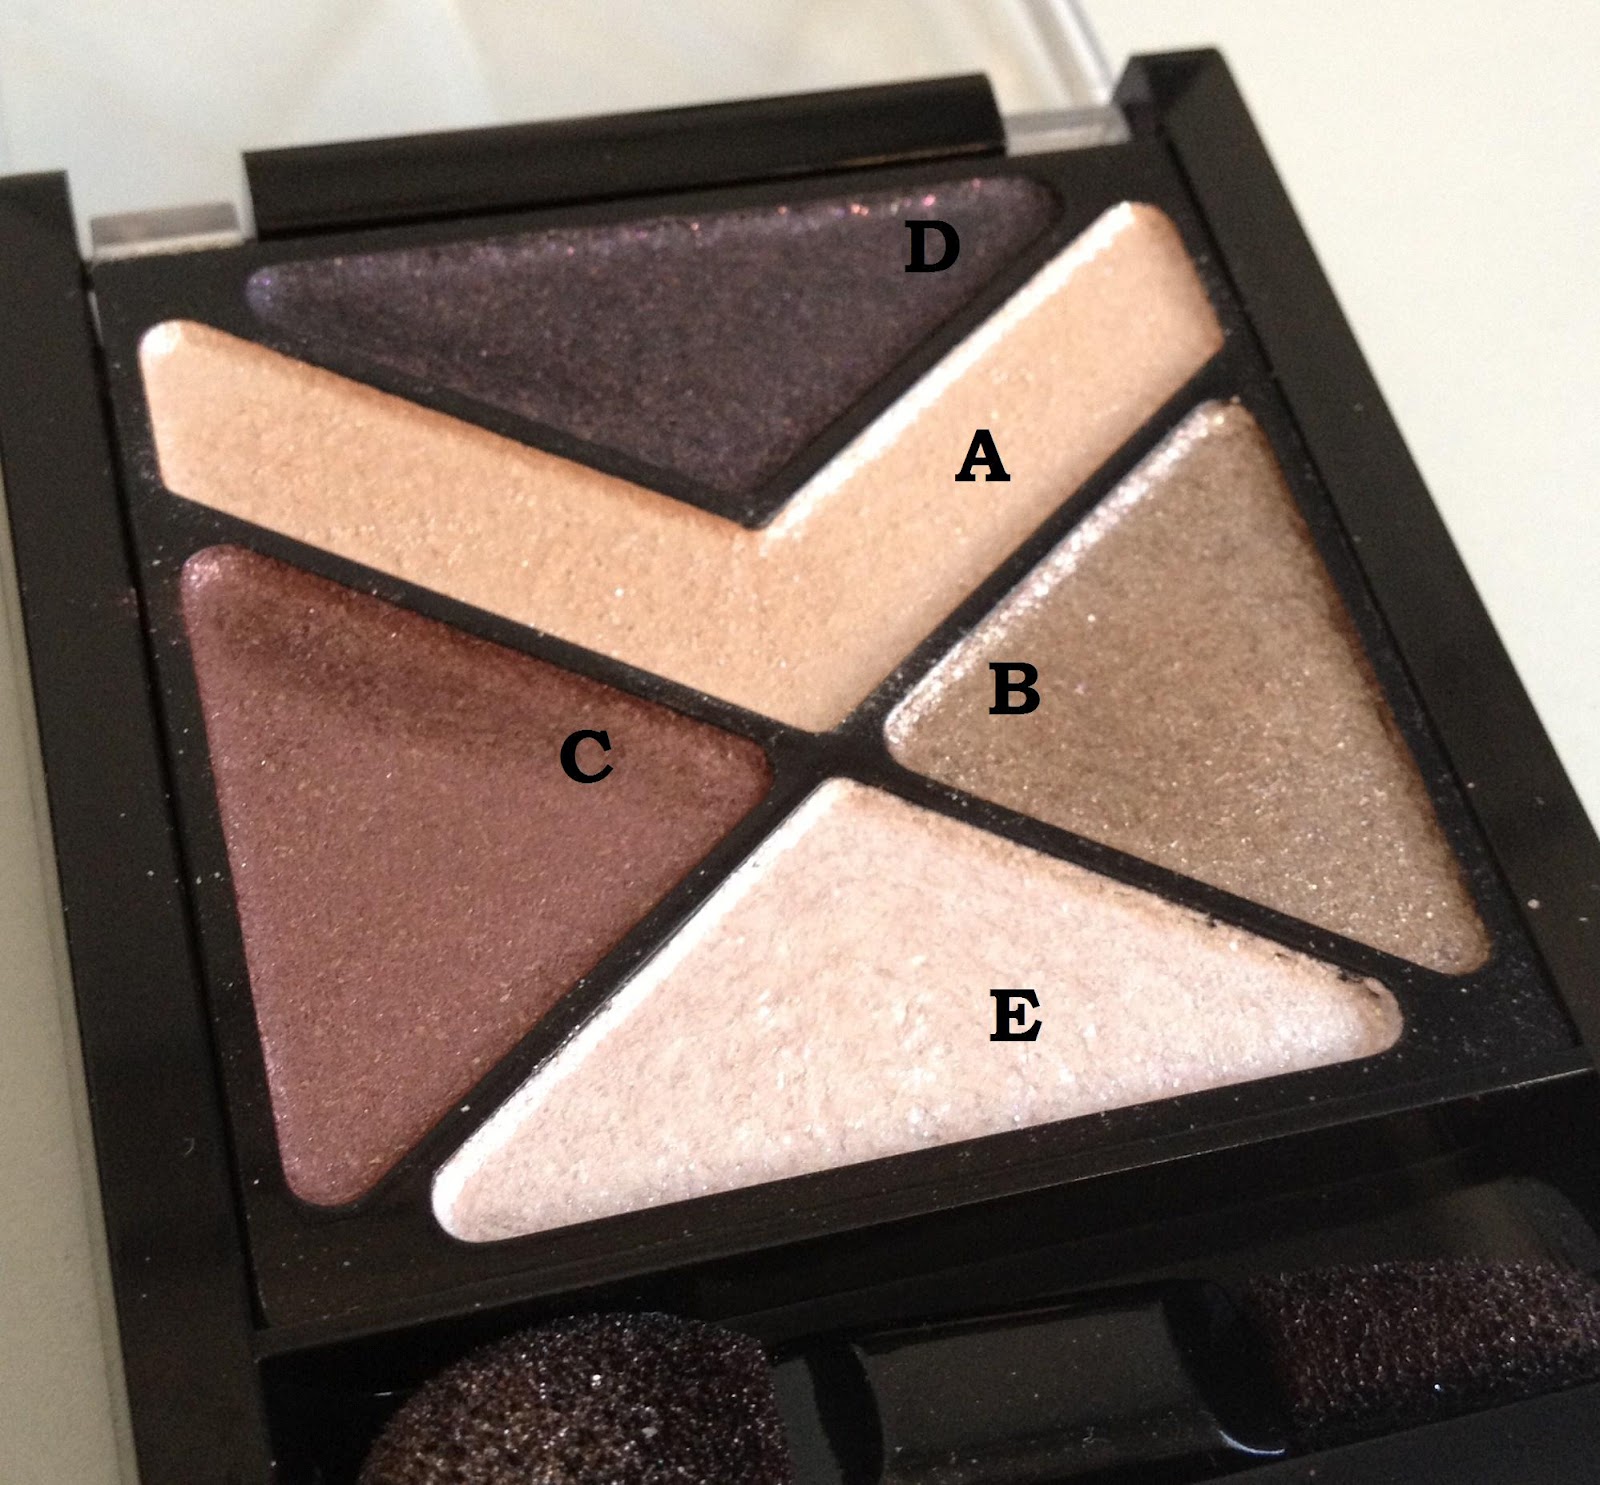
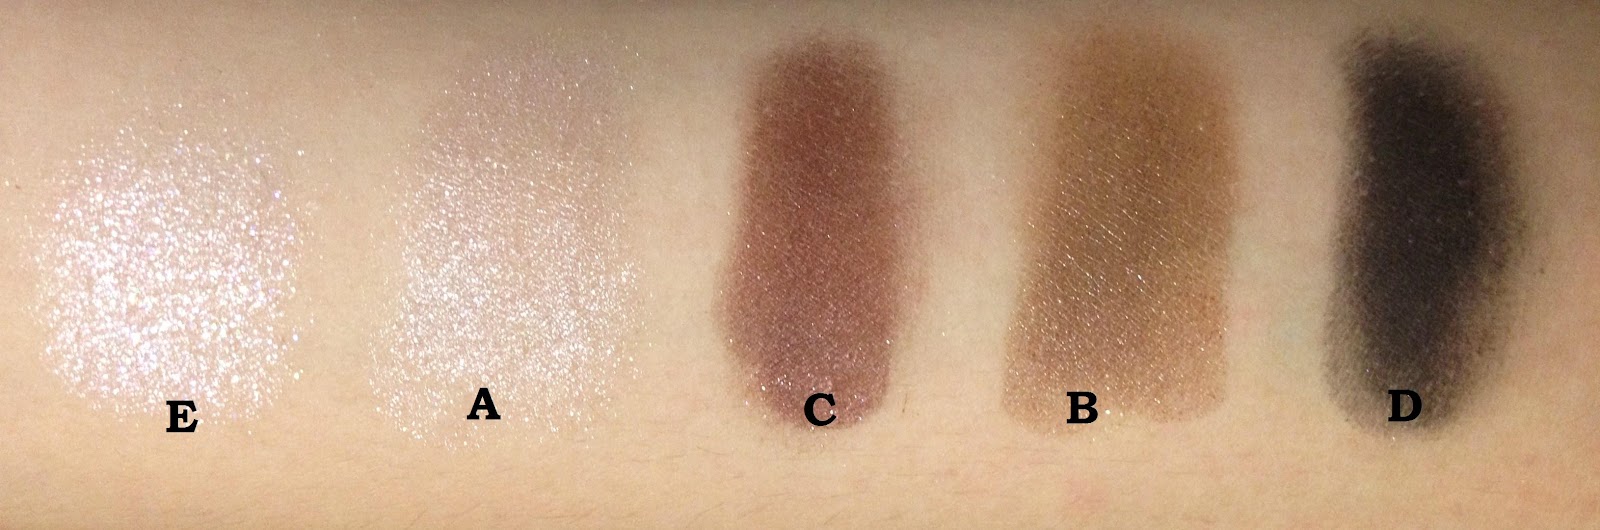
Personally, I use this Estee Lauder kit for the Basic look and I can alternate between the matte or slimmer finish and it came with a blusher!

Top Left to Right: Ivory Slipper (Satin), Nude Fresco (Satin), Sugar Biscuit (Satin), Wild Sable (Matte)
Bottom Left to Right: Safari Green (Shimmer), Hot Cinnamon (Shimmer), Chocolate Bliss (Matte), Lavish Mink (Matte)

Steps for creating the Look
(Note: these images for the steps are by Indian Vanity Case and not mine. I adore her!)

Something Different/ A Little More Colour
Colour... That's the next step, the step towards being adventurous.
You can either turn out looking really interesting and eye catching or... a complete freak show.
The key points of this sort of look are application and shade of colour.
To find out what kind of colour would complement and suit the colour of your iris, just do a quick short online and experiment and practice your application!

Personally, I have played around with various shades of blue, purple and green and not to recently, I decided to add in orange and pink into my collection~
A tip to all ladies who are looking for something adventurous, before buying an eye shadow, head down to a makeup counter with their makeup artist around and get them to help you apply and test out the shades. Dont buy on the spot, wear that look around for the rest of your shopping time and take a feel of how comfortable you are with it in malls and outdoors. Too little ladies are making full use of this service in Singapore! You can return the favor by taking note of their name and head down to the counter the next time and make the purchase from them. More often than not, they are paid by commission so, let's scratch each others' back.
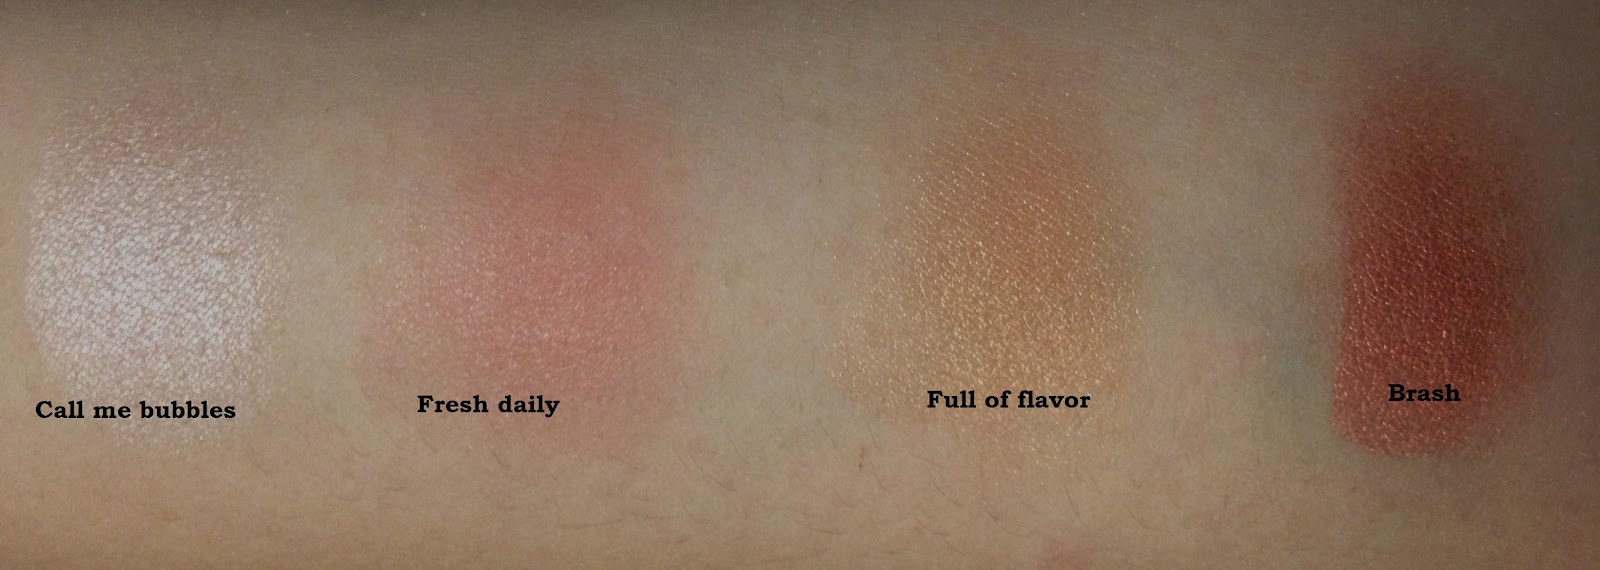
That's how I ended with this kit from M.A.C!

Top Left: Call me bubbles Top Right: Fresh daily
Bottom Left: Full of flavor Bottom Right: Brash

Steps for creating the Look
(Note: these images for the steps are by Indian Vanity Case and not mine.)

Smokey Look
Something to wear for the night? I would usually go with the cliche, smokey look.
The only tip I can give to creating a good smokey look is to blend with gradient.
The look should not be a whole patch of dark shadow on your lids but a soft colour intensity from the inner to the outer corner of your eyes or from your lash line to your brow bone (depending on your eye shape and contour), coupled with an intense eyeliner and coats of mascara!
Personally, I would go for a heavily pigmented shade of colour with glitter flicks in them. I am currently using this kit from Maybelline.

(Note: these images for the steps are by Indian Vanity Case and not mine.)

Notice how she blended the shadow to create the smoked out effect!
Conclusion
I know it may be kind of daunting and seemingly complicated, but with a little bit of patience and a handful of time~ you will be a pro at it!
To end things off, the tips to take away from this post on eye shadow are:
Experiment
Practice
Blend!


0 comments: